
In January 2023, Apple released Apple Business Connect, the company’s own version of Google Business Profile. While Apple Maps and Siri previously used data from business directories like Yelp, TripAdvisor, and FourSquare, the introduction of this new platform now allows owners to manage their business information for themselves. Follow the steps below to ensure your Apple Business Connect listing is set up and optimized correctly.
- What You’ll Need to Set Up Apple Business Connect
- How to Create an Apple Small Business Account
- How to Create an Apple Enterprise Account
- How to Create an Apple Third-Party Partner Account
- Ways to Optimize Your Apple Business Connect
What You’ll Need to Set Up Apple Business Connect

You’ll first need to create an administrator Apple ID for your business. After logging in with the new Apple ID and agreeing to the terms of use, you’ll indicate the scale of your company by choosing between the three Apple business account options:
- Small Business: One business with under 25 physical locations
- Enterprise: A “large brand or chain” with over 25 locations
- Third-Party Partner: An organization that is managing Apple Business Connect on behalf of an Enterprise
How to Create an Apple Small Business Account
After selecting “Small Business” and clicking “Next,” here’s the information you’ll need on hand to get your Apple business listing started:
- Legal name of your organization
- Physical address (including country and region)
- Phone number
- Business hours
Step 1: Add or Claim Your Business Location
Your small business could already have an Apple Maps listing in their system. To claim your Apple business location or confirm that one doesn’t already exist, follow these steps:
- Search the name of your business
- Click “Next” if you find your location in the search results
- Add detailed address information (like a specific suite number) if applicable
- Adjust the location of your map pin to the front door of your business
- Once you’re done, select “Next” again
If your business location isn’t shown when you search for it, you can easily create one. Here’s how:
- Click the “Add location with this name” prompt
- Select the correct address
- Click “Next”
- Follow steps 3 through 5 above
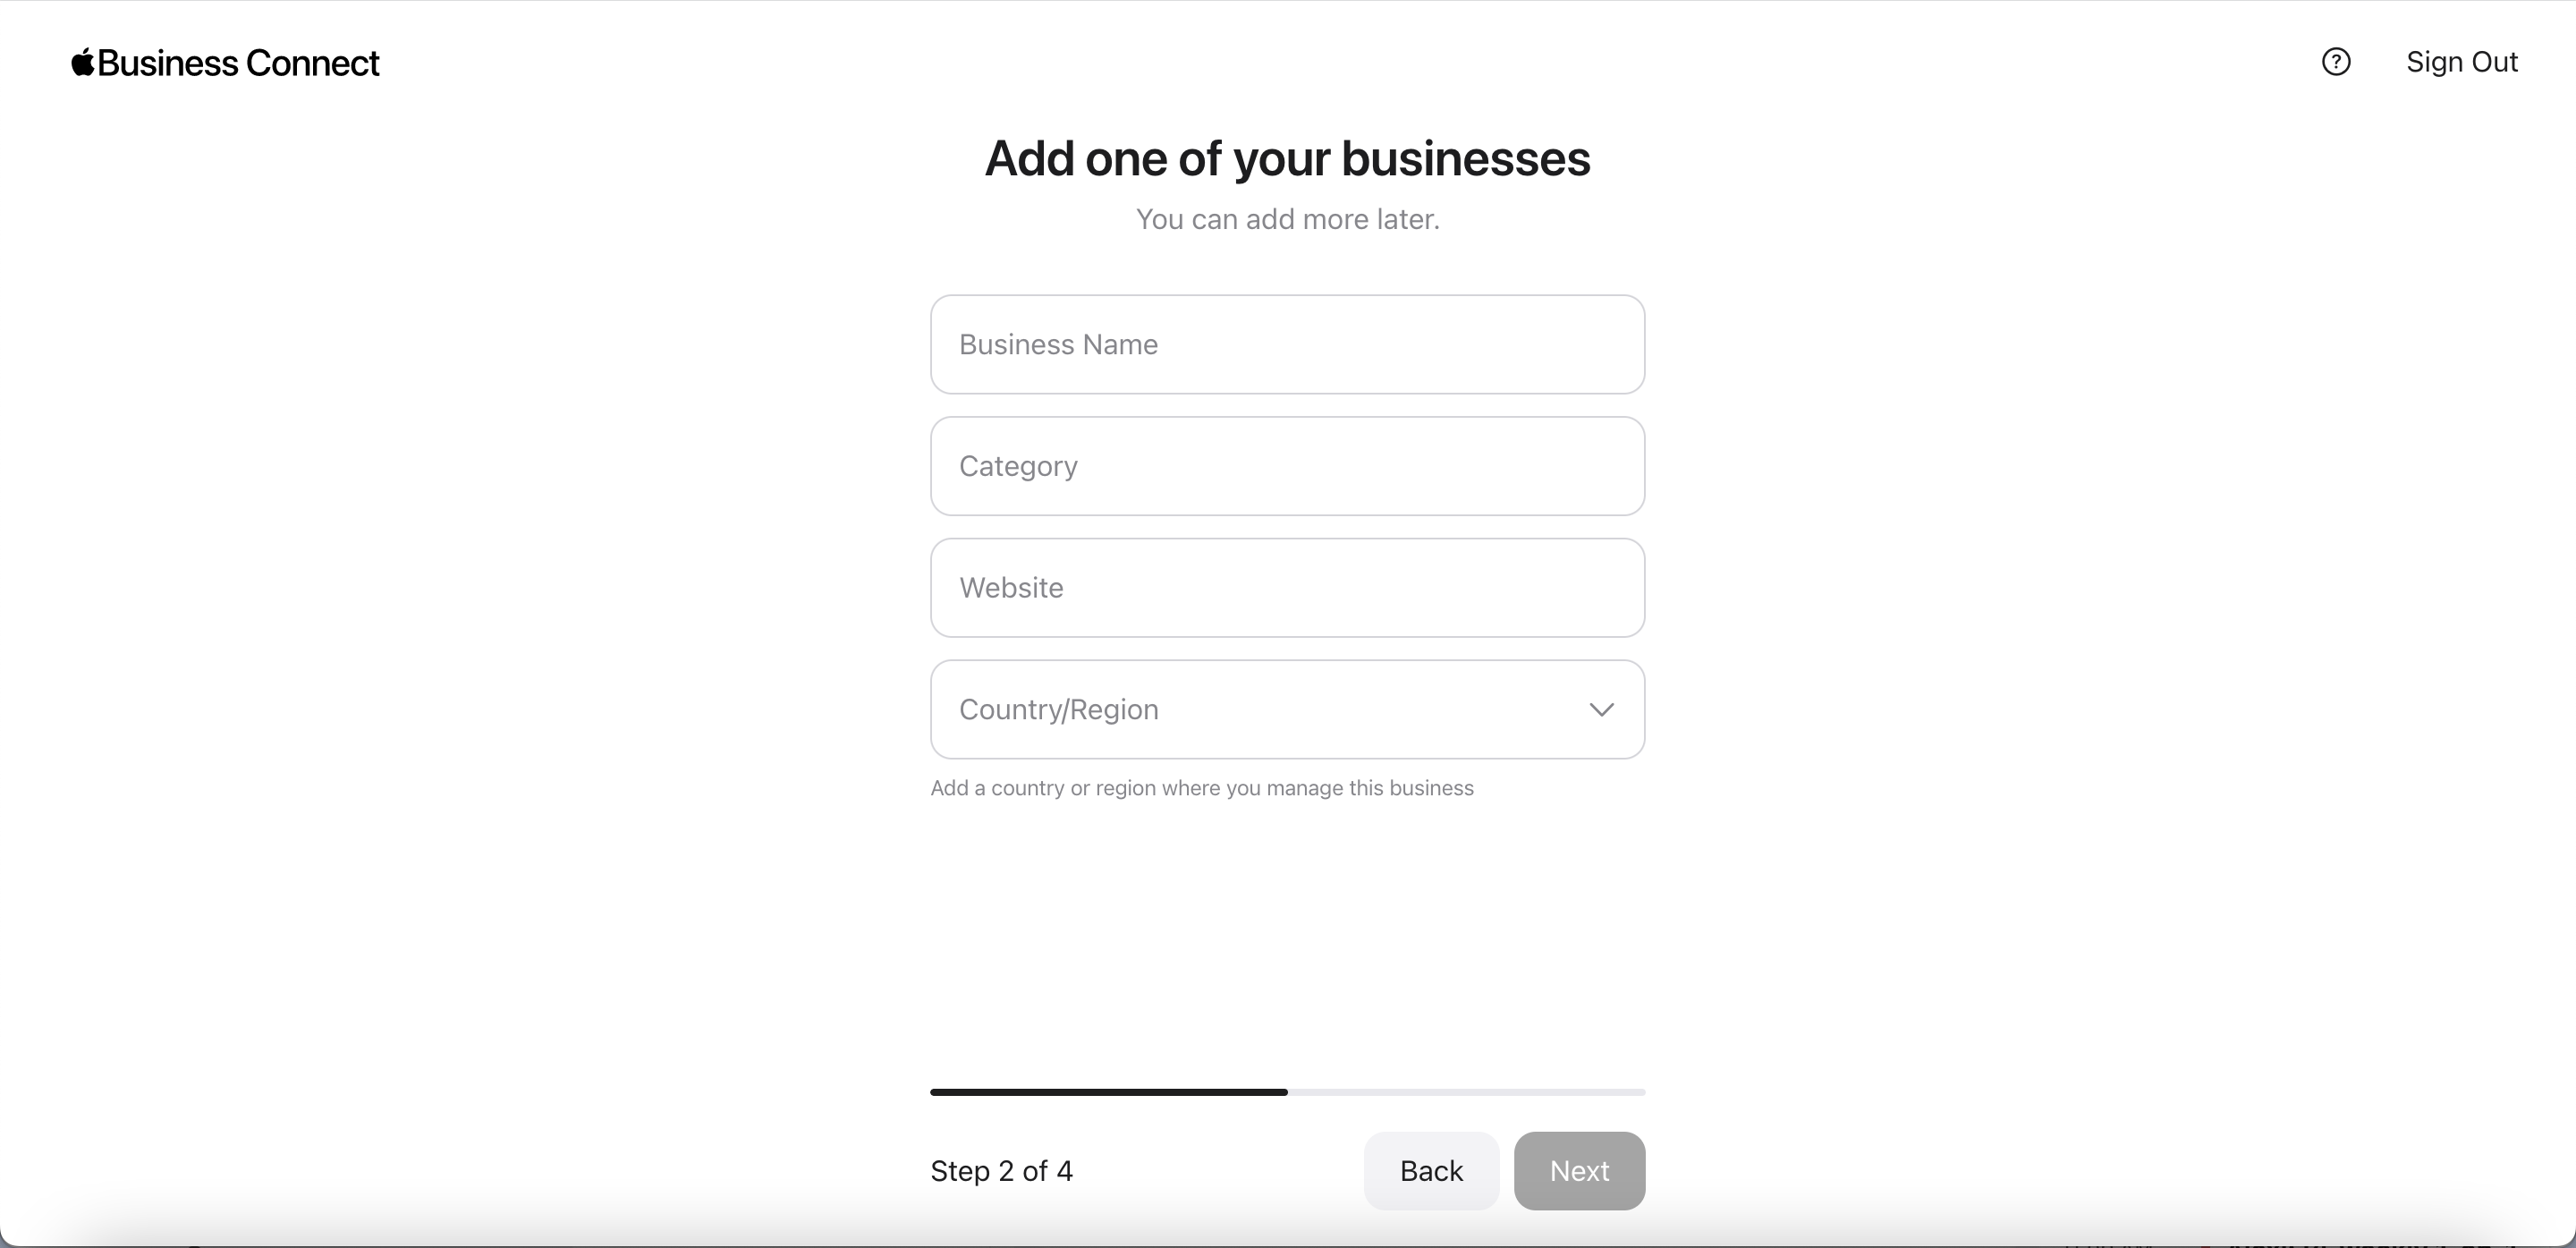
Step 2: Fill Out Location Attributes
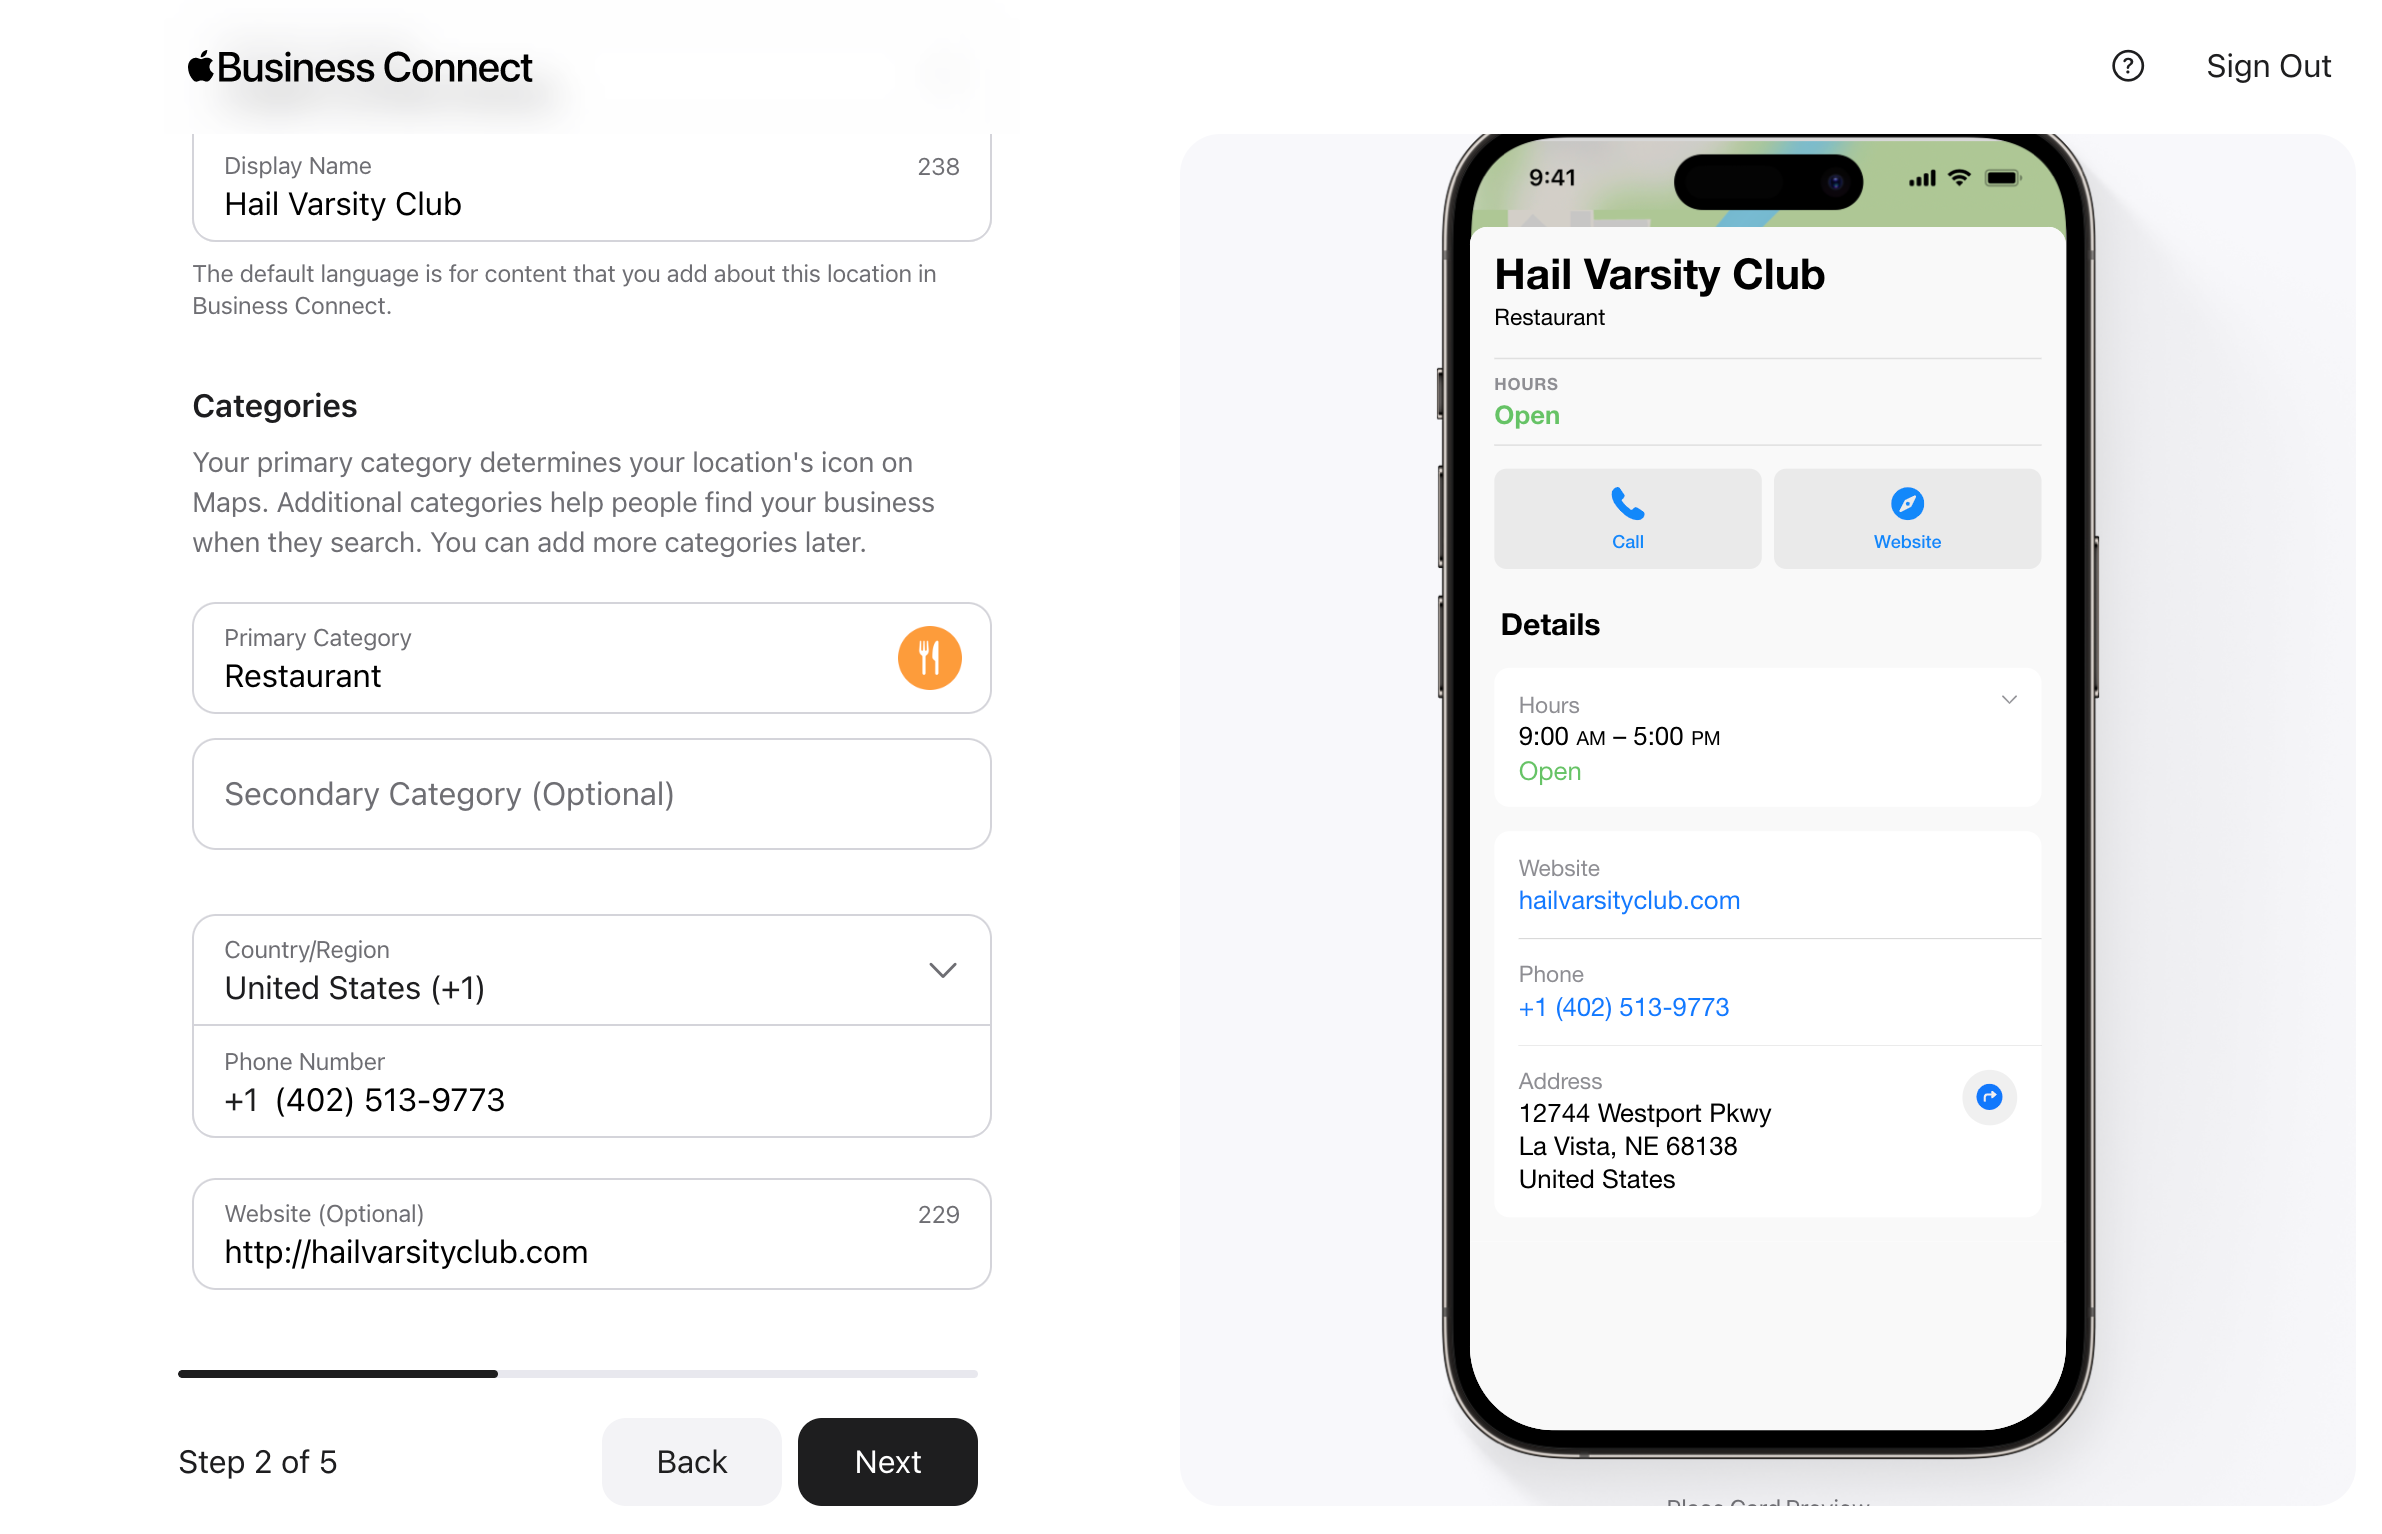
After creating or claiming your business location, you’ll be asked for more specific information about your business to help customers better find you online. You have the option to add these location attributes:
- Default language
- Business name as you want it to appear in your listing
- Business website or specific location page
- Primary business category
- Additional business category
With about 240 categories available on Apple Business Connect, you may not know which is the best choice for your business. While you can browse the list of business categories to find the perfect one, the best way to choose the right primary category for your business listing is by thinking about the main function of your business. Your primary business category should reflect this main function, and your additional categories should fit under it.
For example, if you own a bike shop that sells speciality e-bikes and offers repair services, a great primary category would be “Bicycle Shop,” with secondary categories “Bicycle Repair” and “Special Bikes.”
Step 3: Enter Location Hours

Once you’ve selected your categories, you’ll want to fill out your hours of operation and temporary or holiday hours for each location.
It’s important that these are accurate so that your customers always have the best experience possible. It can damage your reputation if a potential customer shows up to your business when it says you’re open online, only to find the shop is closed.
Step 4: Verify Your Business
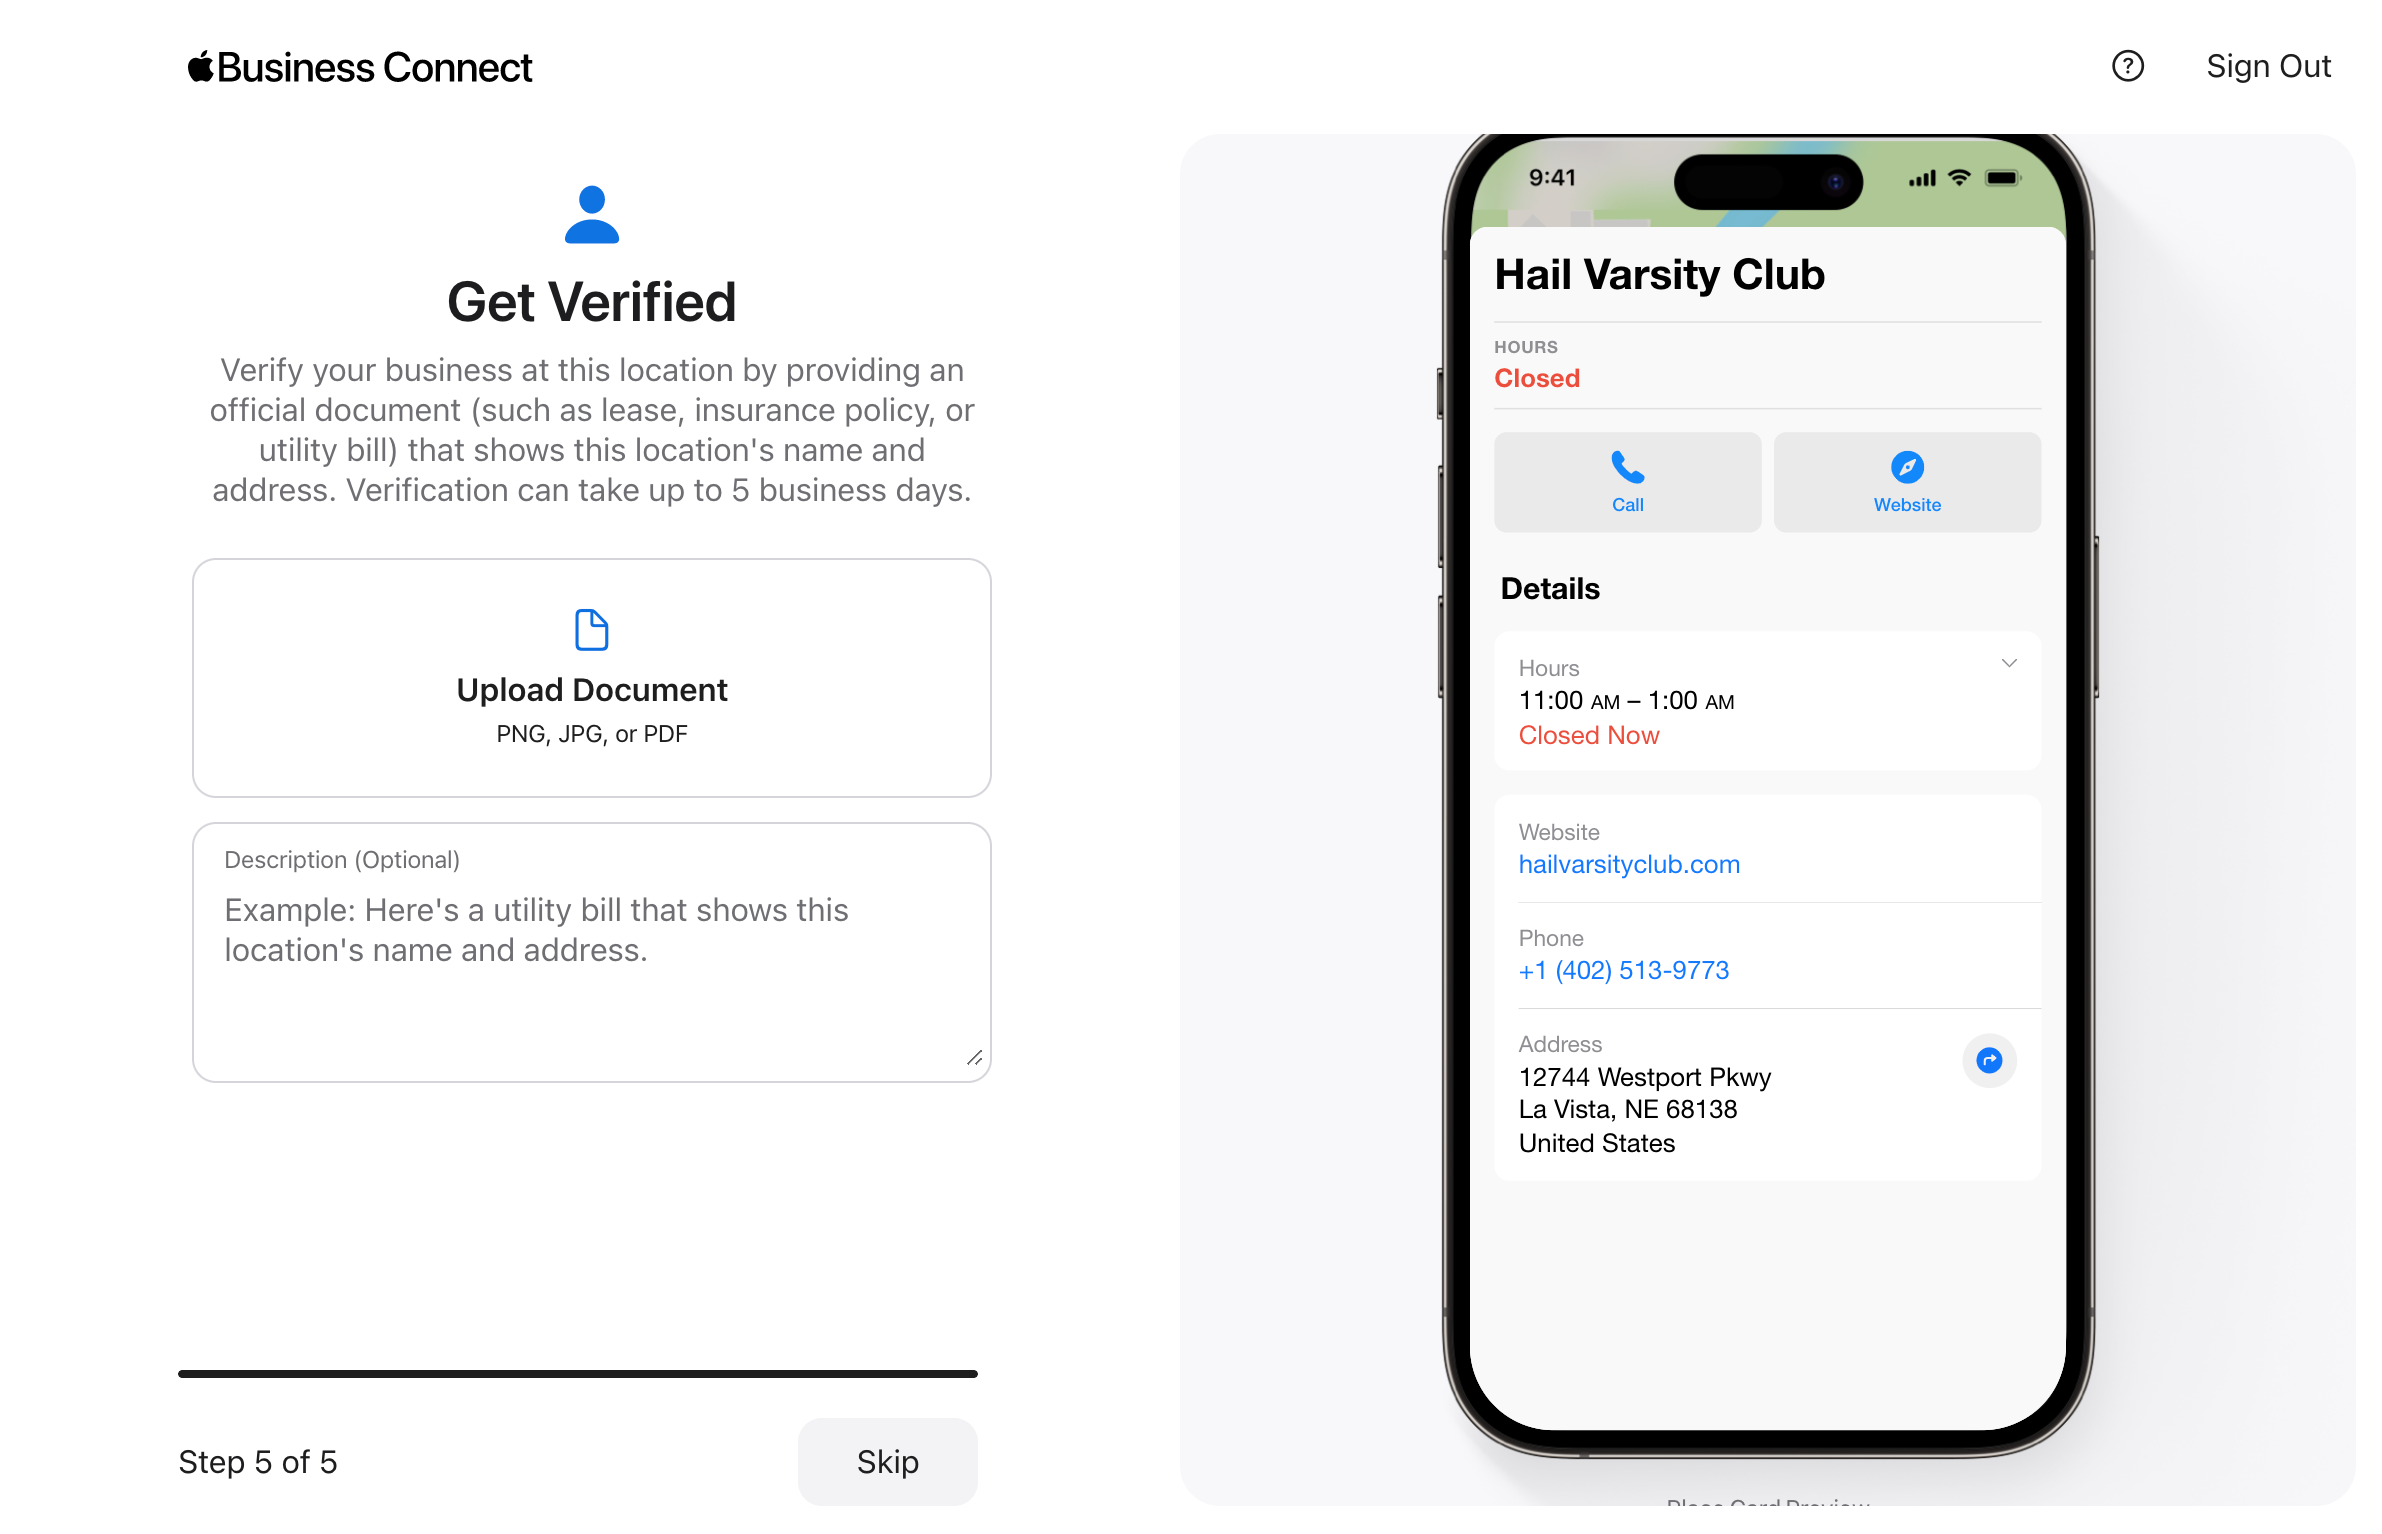
Verifying your business is the final step in setting up your Apple Business Connect account. Before your listing can be shown to the public, you’ll have to confirm that you either are the business owner or have permission to manage this location. There are two methods to do this:
- Phone Call: You’ll receive a verification code to your phone number if you provided one. If you have a specific extension, you can add that as well.
- Document Review: You can upload official documentation like a lease, utility bill, or insurance policy that has your business’ name and address as proof that you own or manage the business.
The phone call is the faster method for verifying your business. With this option, your listing is approved as soon as you enter the verification code sent to your phone, while the document review can take up to five business days. However, if your phone number can’t receive a verification code or if the number shown isn’t correct, uploading documents is the easier route.
How to Create an Apple Enterprise Account
If you selected “Enterprise” as your business type, the information you need is slightly different than a small business. In order to register your umbrella organization, each business, and every location, you’ll need the following information before clicking “Next”:
- Legal name of your organization and each business
- Physical addresses of organization headquarters and businesses (including country or region)
- Phone numbers
- D-U-N-S number of your organization
- Business categories
- Website URL for organization and businesses
- Verification documents for organization and businesses
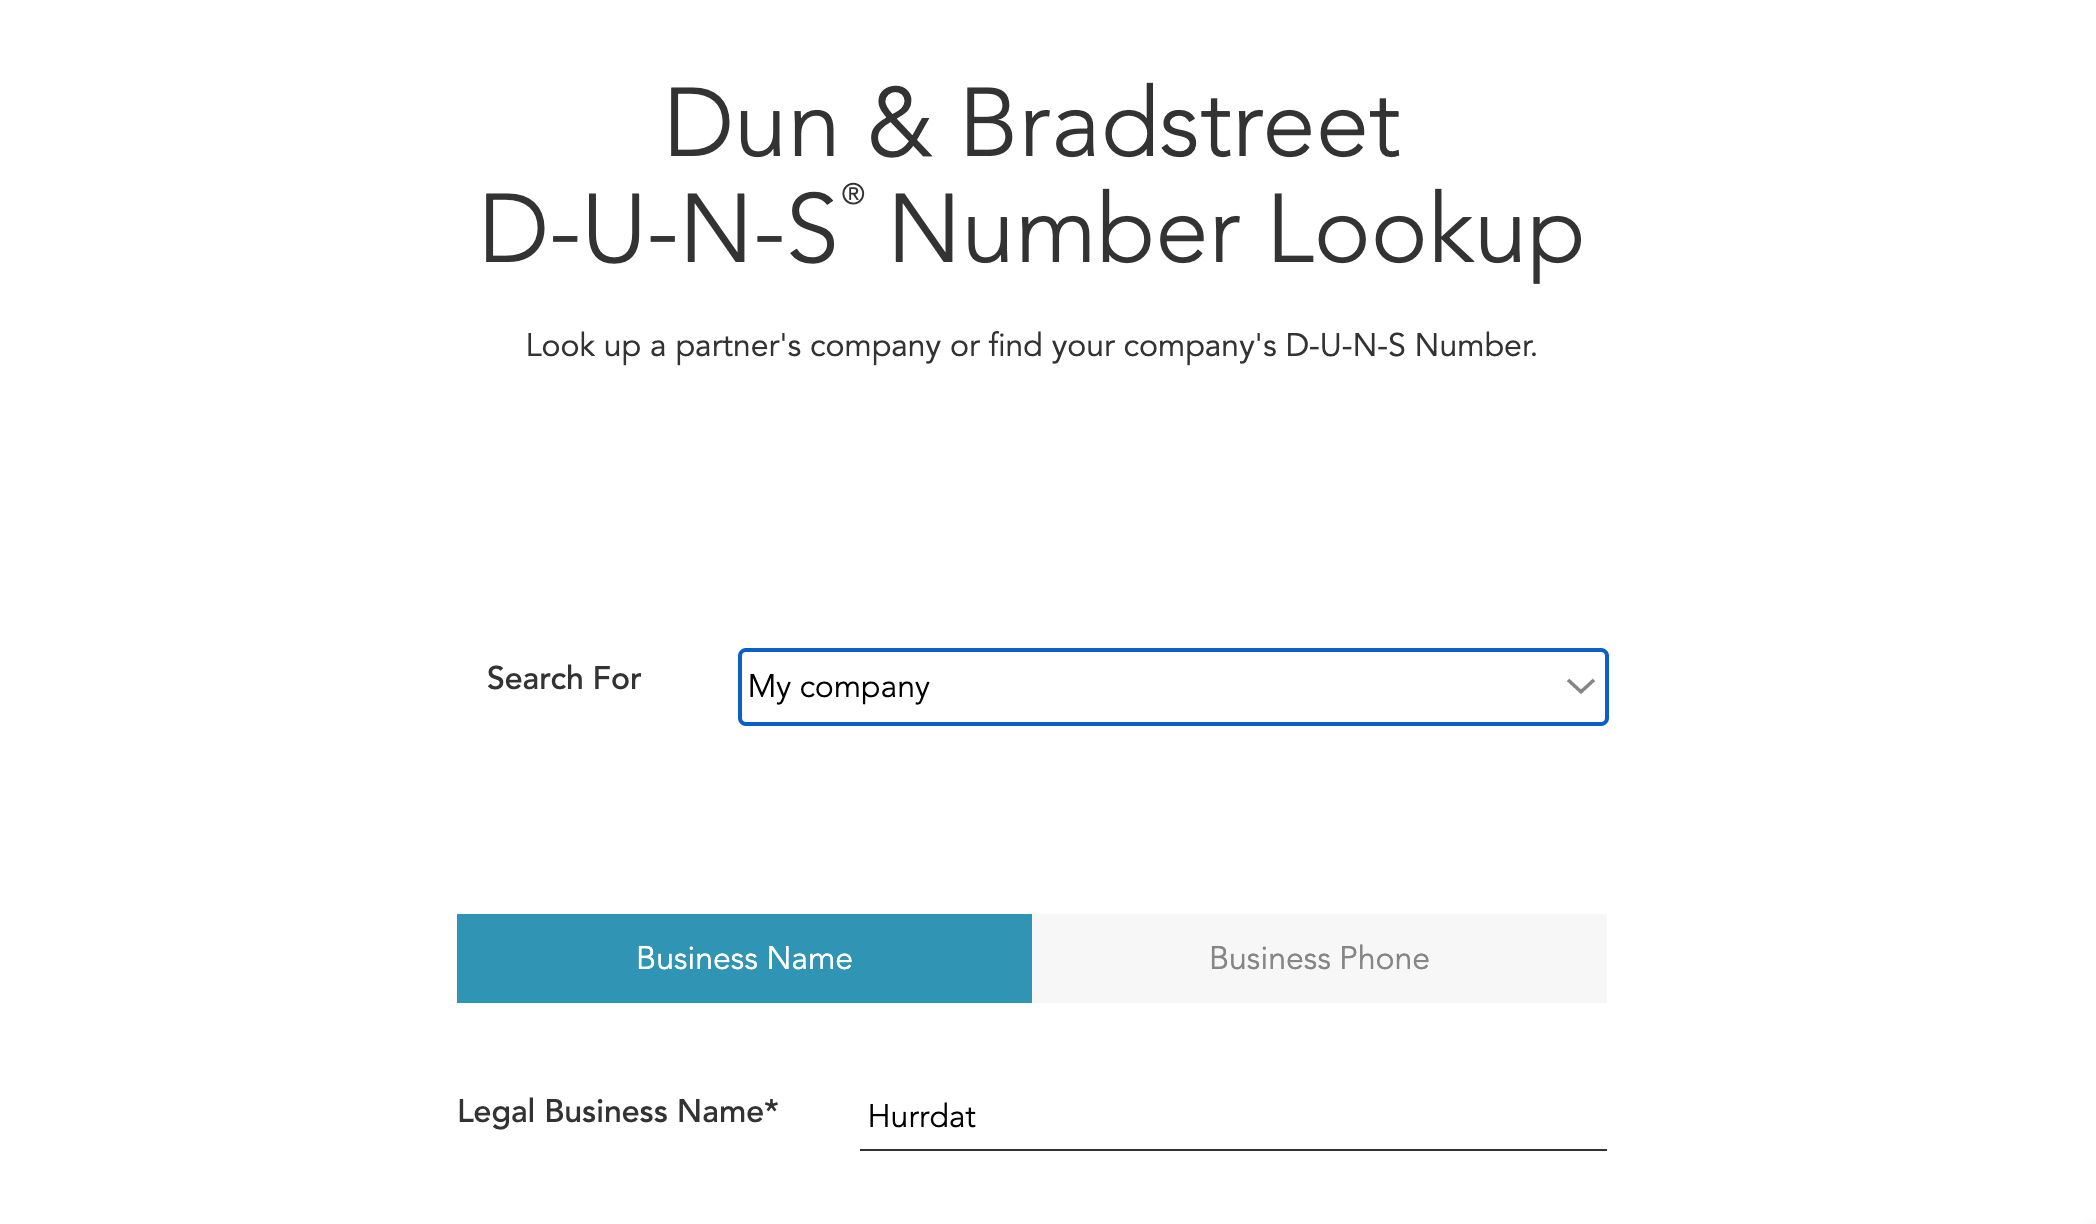
D-U-N-S stands for “Data Universal Numbering System.” Your D-U-N-S number is a unique nine-digit code assigned to your organization when it’s registered in the Dun & Bradstreet database. This database is what Apple uses to cross-check businesses. Either look up your number or apply for a D-U-N-S number.
Step 1: Enter Organization Information
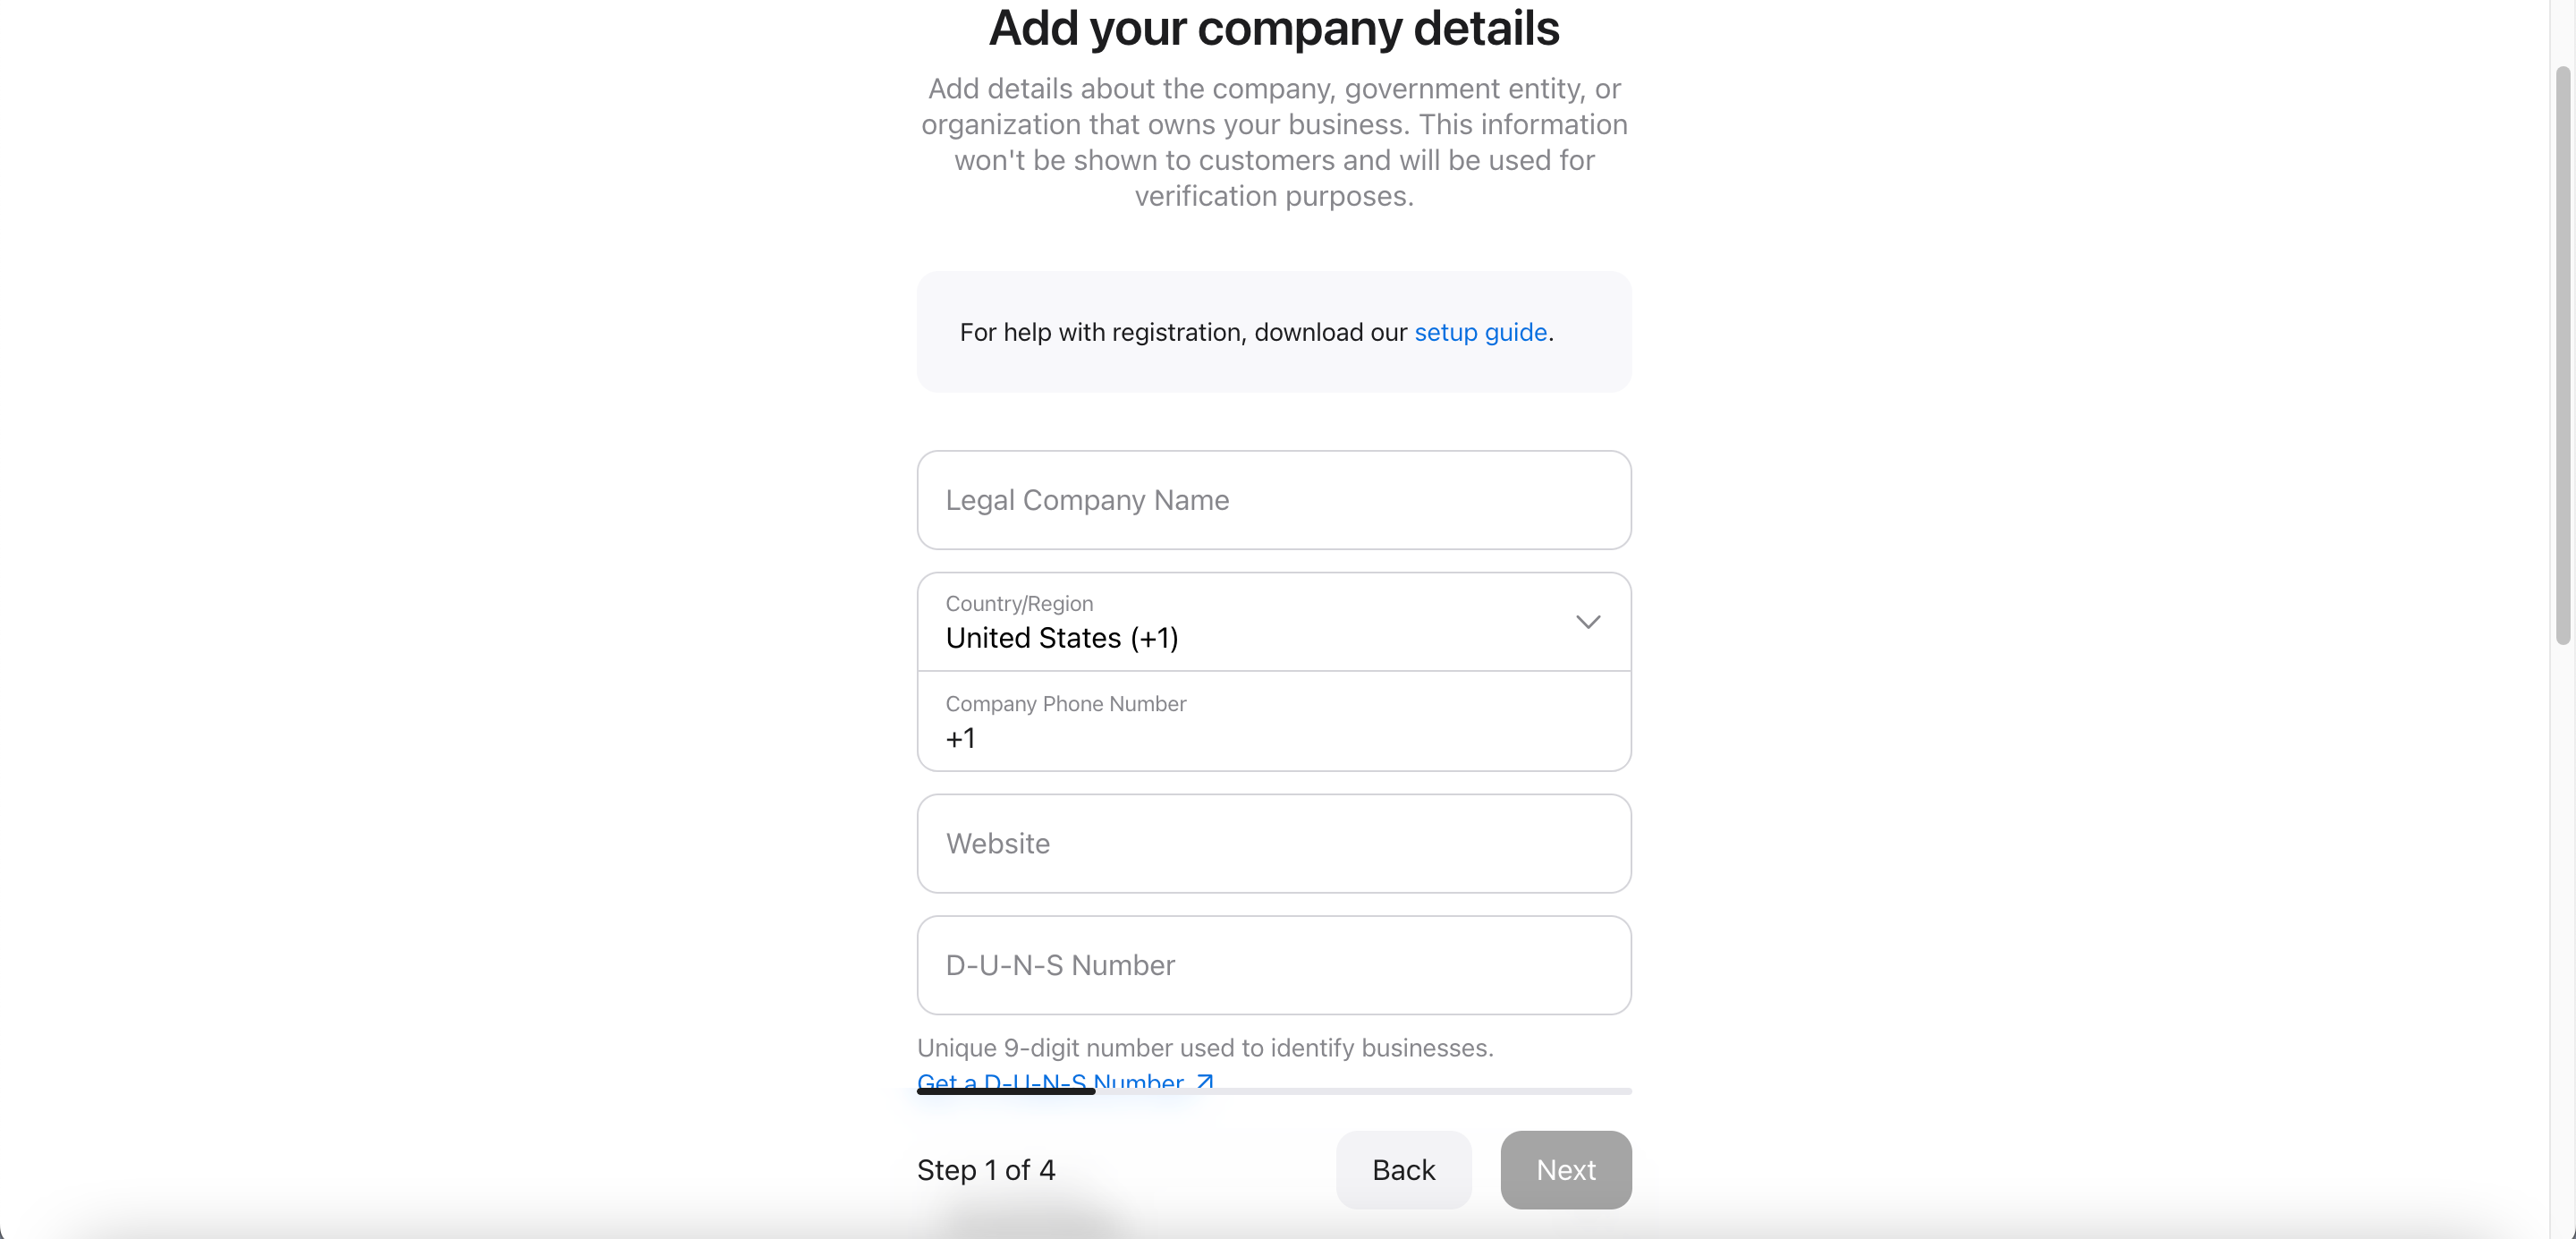
The first step you’ll need to take to set up an Enterprise account on Apple Business Connect, is to enter your company details, which refers to your umbrella organization. You’ll be asked to provide:
- Legal name of organization
- Address of organization headquarters
- D-U-N-S number
- Organization phone number
- Organization website URL
Step 2: Add Your First Business
After typing in your organization information, Apple will prompt you to create your first business under this organization. To do so, you’ll include:
- Business name
- Business category (choose from the drop-down list that appears when you start typing)
- Business website
- Country of business location
Your umbrella organization may have the same legal name, website, phone number, or address as one of your main businesses. This is perfectly fine. Apple will allow you to register both your organization and business with matching information.
Later, just like you would for a small business, you’ll have the option to add more details like business hours, languages, and other attributes to your locations.
Step 3: Verify Organization & Business Information
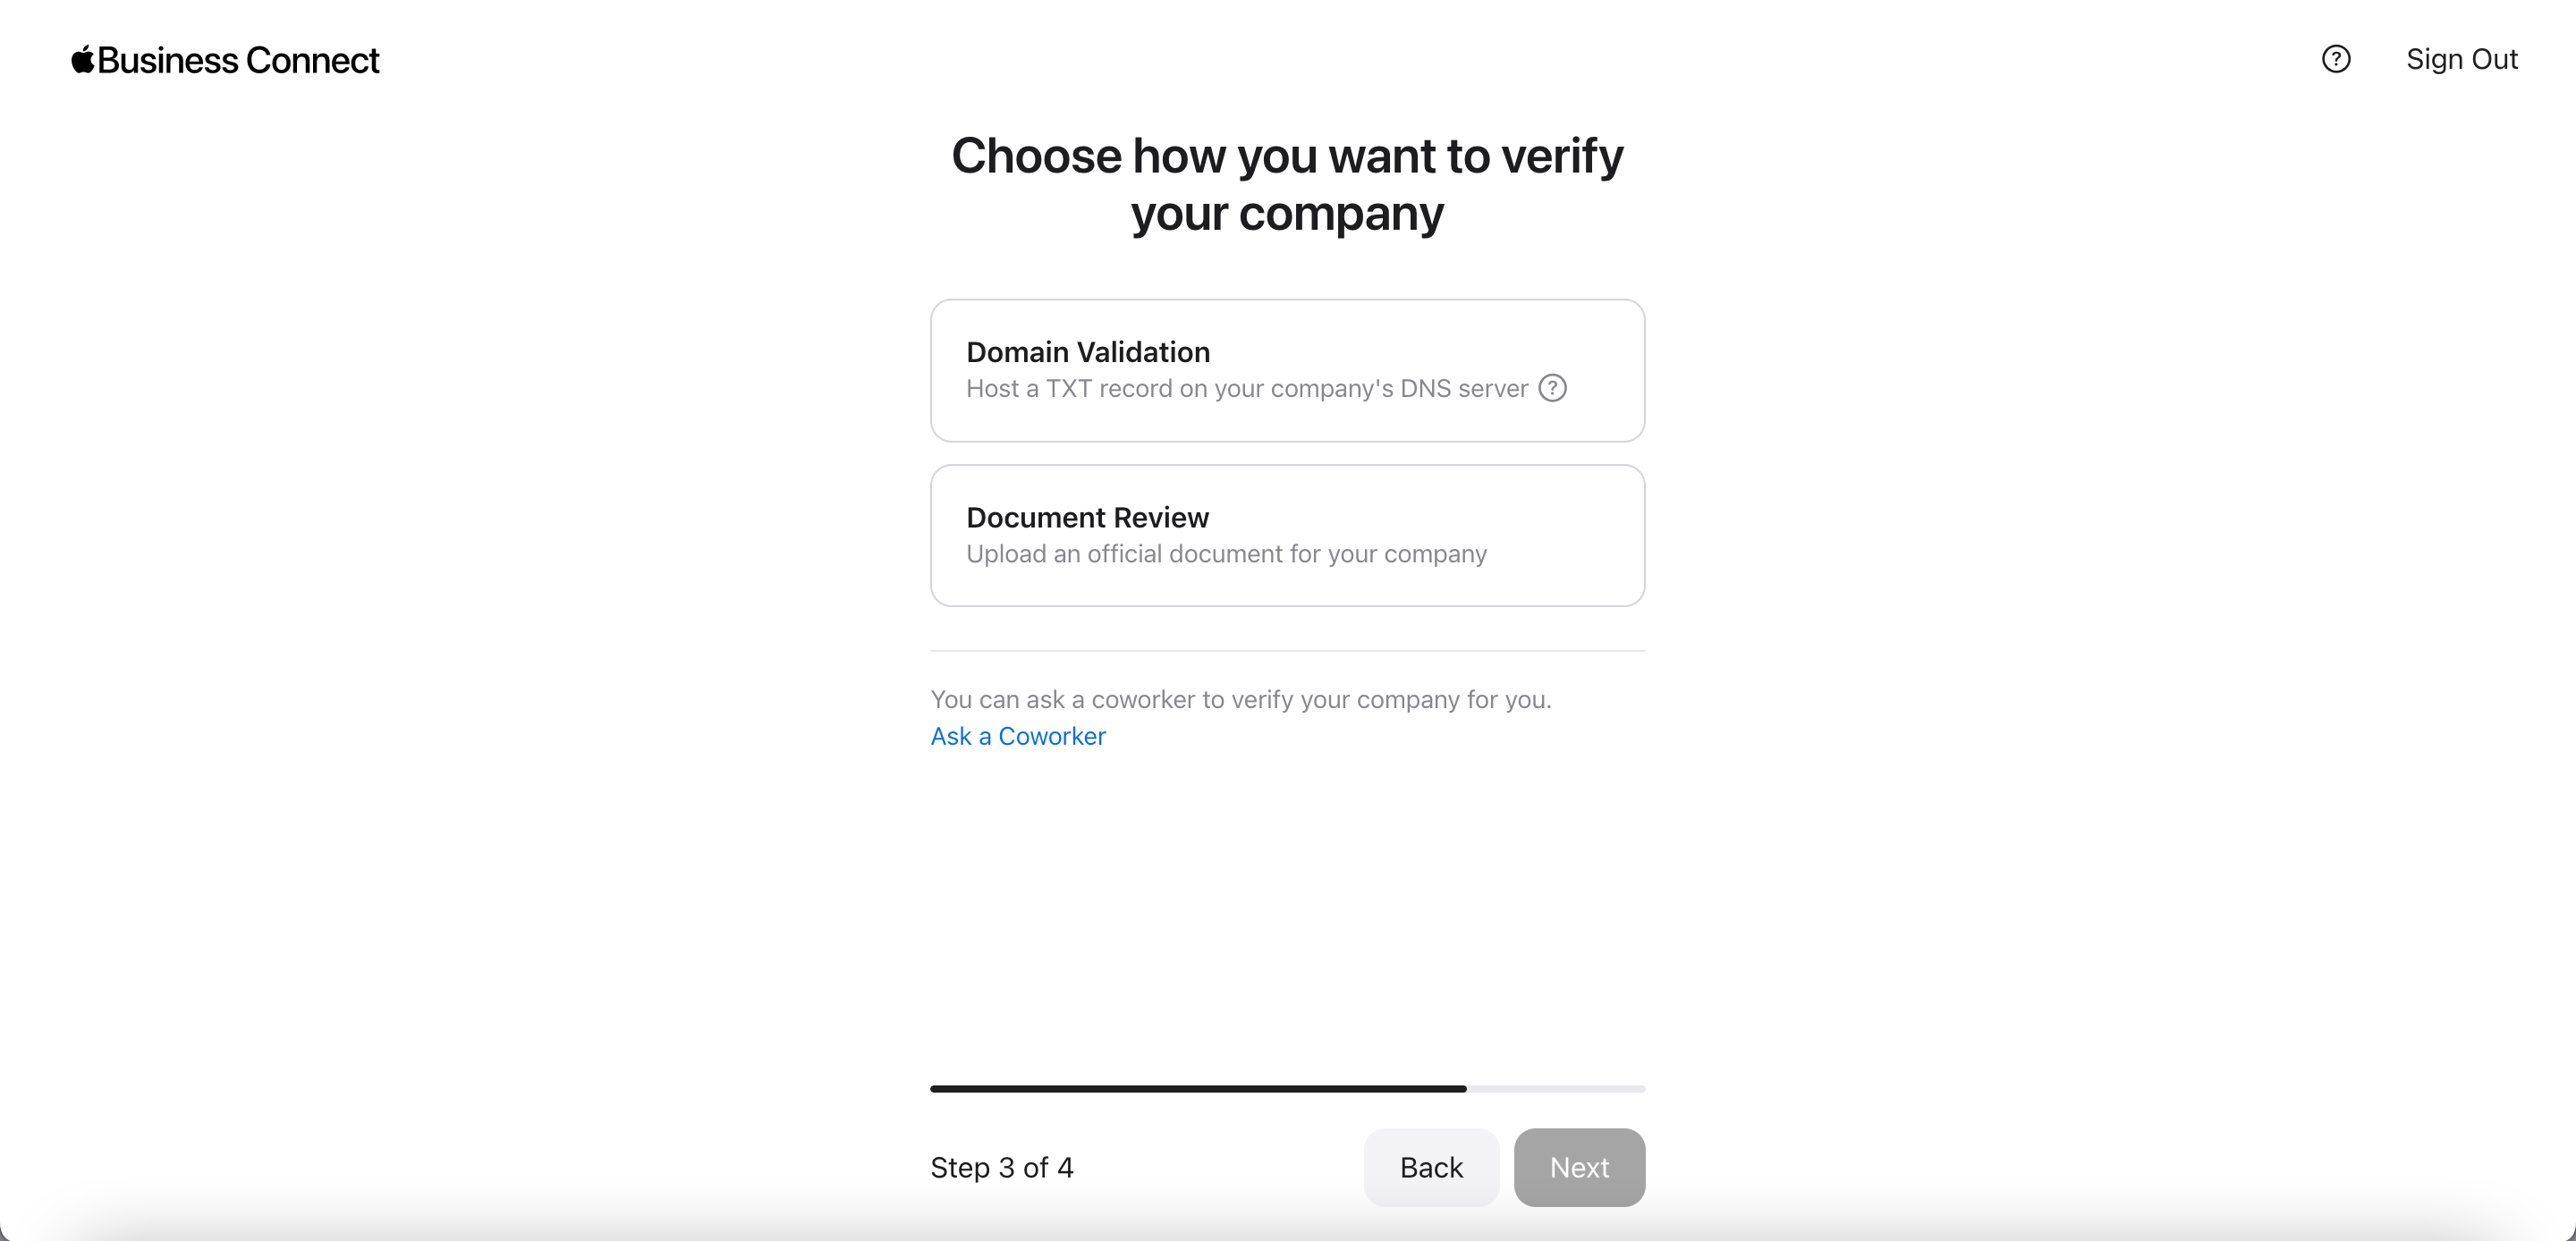
There are two verification steps required—one for your organization, another for each business you add beneath it. To confirm your information is accurate and you’re the right person to be managing this account, you’ll go through one of these verification steps:
- Domain Validation: Apple will give you a TXT record to copy and add to your website’s DNS (Domain Name Service) zone file.
- Document Review: Similar to the small business document review verification method, this option requires you to provide a business license or utility bill with your umbrella organization’s name and address.
From there, verifying your individual business information is the same process as the document review, so you can either send a lease, utility bill, or insurance policy with the business name on it.
Once your company is fully verified, you can add another business or delegate access to a third-party partner that will manage your business listings.
How to Create an Apple Third-Party Partner Account
Since third-party partners manage Apple Business Connect listings on behalf of other organizations, you won’t need to provide business or location information to create an account. Here’s the information you’ll need for the organization you want to manage:
- Legal name
- Address (including country and region)
- Phone number
- Website
- D-U-N-S Number
Simply put in the organization’s details and follow the same company verification steps as the Enterprise account.
After your account is verified, you’ll be able to share your company ID with organizations that want you to manage their Apple Business Connect business listings.
Ways to Optimize Your Apple Business Connect
Setting up your Apple Business Connect listing with accurate NAP (name, address, phone number) data is just the first step. To better your chances of showing up in local search results on Apple Maps, here’s how you can optimize your Apple Business Connect listing:
- Add photos to your locations that comply with Apple’s photo standards.
- Configure a Place Card for each location with details like logos and cover photos to customize how you appear to customers in places like Apple Maps, Siri, Calendar, and Messages.
- Create Showcases to advertise new deals, products, promotions, or sales for up to 30 days with a customized call to action.
There are three best practices for small businesses to follow when creating their first Showcase: (1) Plan Ahead — Unlike Google Posts, Apple has a three-day review period, so double check that you’re following photo and text guidelines to prevent any delays. (2) Write Direct Titles — Character count is limited, so your title needs to get straight to the point, but still catch your customers’ eye. (3) Add an Action Button — This allows potential customers to engage with your Showcase. — Alexi Wilt, Local Search Director
- Check Insights for a single business location or multiple business locations to see how customers found your location(s) and how they interacted with your listing(s).
Need help with your local business listings? Local Search Fuel by Hurrdat provides a number of digital marketing solutions for small business owners, including Apple Maps listing management to get your business found by more customers. Get started today!

Stefanie Vanderbeek
Stefanie Vanderbeek is a content strategist and writer who specializes in long-form digital content and website SEO optimization. Stefanie earned her Bachelor of Journalism from the University of Nebraska-Lincoln in Advertising and Public Relations in 2021. In her free time, you can find Stefanie reading, deep diving into video game lore, singing in her professional vocal group, or traveling the world!